Winter is notoriously unforgiving on residential structures, and your roof serves as the primary shield against the brunt of seasonal weather. Freezing temperatures, howling winds, heavy snowfall, and insidious ice dams work together to exploit the slightest vulnerability in an exterior envelope. While many homeowners take an “out of sight, out of mind” approach to their roofs during the mild summer months, autumn presents a critical window of opportunity. Waiting until the first snowstorm to discover a leak transforms a manageable maintenance task into a costly, high-stress emergency in the dead of winter.
Preparing your home for severe winter conditions requires a structured, proactive approach. By conducting a thorough seasonal assessment, clearing critical drainage pathways, repairing minor structural defects, and establishing a professional support plan, you can protect your living space, safeguard your insulation, and maximize the service life of your roofing system. This comprehensive guide breaks down the essential pre-winter tasks every homeowner should complete before the first hard freeze.
Conduct a Thorough Visual Assessment Before the First Freeze
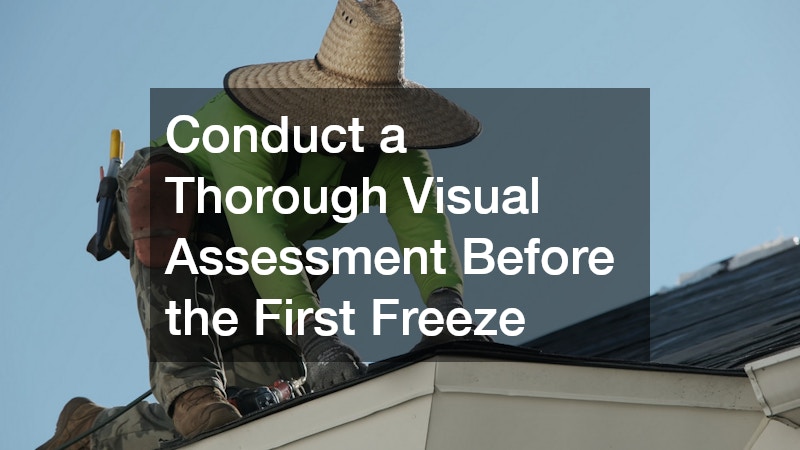
A successful winterization plan starts with a detailed inspection while weather conditions are still favorable. Catching minor wear and tear during early autumn prevents cold precipitation from infiltrating underlying layers, where freeze-thaw cycles can expand small fissures into major structural failures. A thorough visual evaluation should encompass both an external view of the exterior surface and an internal review of your attic space.
Start your external inspection safely from the ground using a high-powered pair of binoculars. Walk around the entire perimeter of your property, taking note of every slope and valley. Look closely for shingles that are curling at the edges, buckling in the middle, or missing entirely. Pay close attention to the protective granules on asphalt shingles; heavy granule loss leaves the underlying organic or fiberglass mat exposed to moisture and harsh ultraviolet rays. Examine the flashing around vertical penetrations—such as chimneys, skylights, plumbing vents, and attic exhaust pipes—because these points of intersection are notorious for allowing water intrusion if their sealant has cracked or pulled away.
Your external inspection checklist should specifically track missing, cracked, or curling shingles, as well as excessive granule loss, pooling in low spots, or gutters. Be sure to document any loose, rusted, or bent flashing around penetrations and keep an eye out for noticeable sagging along the ridgeline or roof valleys.
Once you have assessed the exterior, head indoors to inspect the underside of the roof deck from within your attic. Bring a bright flashlight and complete this step during daylight hours. Turn off the light for a moment and look up; if you see specks of daylight poking through the roof boards, water can easily follow those same paths during a heavy storm. Turn your flashlight back on and search for dark water stains, soft spots in the wood, or visible mold and mildew growth along the rafters. Inspect the attic insulation as well. Compressed, damp, or matted insulation indicates existing moisture intrusion and dramatically reduces your home’s thermal efficiency, leading to higher heating bills and an increased risk of ice dam formation.
Taking the time to complete these seasonal observations ensures that your residential roofing system remains structurally sound throughout the cold months. If your ground-level and attic checks reveal widespread damage, severe sagging, or advanced material degradation, schedule a formal evaluation with trusted local roofers before winter storms make high-altitude repairs dangerous and difficult.
Clear Debris and Protect Exterior Envelope Connections
Water management is the single most important factor in winter roof survival. When snow accumulates on a roof, heat escaping from an improperly insulated attic melts the bottom layer of snow. This liquid water flows down the slope until it reaches the cold overhangs and eaves, where it refreezes. This process creates an ice dam—a ridge of ice that blocks further meltwater from draining off the edge. Trapped behind the dam, standing water backs up under the shingles, seeping directly into the ceilings and walls of your home.
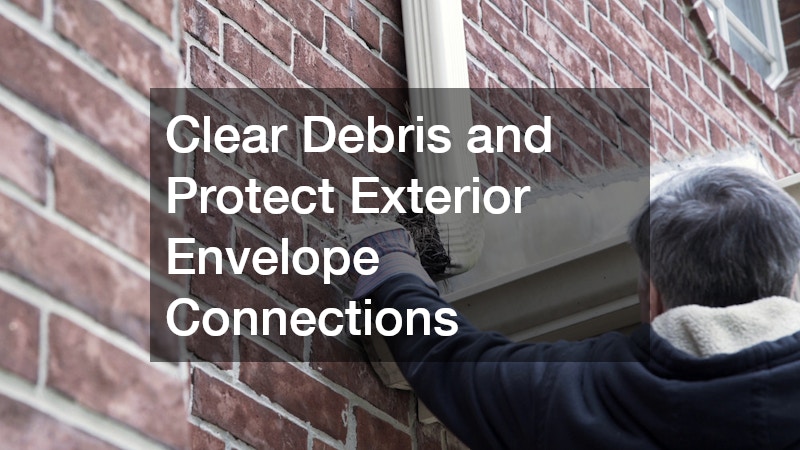
Clearing your drainage network before temperatures drop below freezing is the most effective way to prevent ice dams. Autumn leaves, twigs, pine needles, and airborne dirt naturally accumulate in gutters and downspouts. When clogged with debris, gutters trap standing water, which freezes into solid blocks of ice during cold snaps. The immense weight of ice-filled gutters can pull the seamless aluminum channels away from the fascia boards, damaging your roof line and leaving wood exposed to rot.
To properly maintain your drainage network, start by scooping out all solid debris from the gutter troughs. Next, flush the entire system with a garden hose to verify smooth flow through downspouts and clear any hidden clogs. Take time to tighten loose gutter hangers and fascia mountings so they can bear heavy snow loads. Finally, consider installing mesh or micro-mesh gutter guards to permanently block falling autumn leaves.
Beyond gutter care, you must evaluate all points where the roof meets surrounding building materials. The joints around dormers, side walls, and exterior cladding are prone to water intrusion when wind-driven rain or melting snow accumulates. Ensuring that these vertical junctions are completely sealed protects both the roof edge and the underlying wall framing from hidden moisture build-up. Neglecting these exterior joints can lead to rot in your wall cavities, compromising your home’s structural integrity.
Executing these seasonal maintenance steps alongside comprehensive siding services helps maintain an airtight, water-resistant barrier around your entire property envelope. Furthermore, investing in comprehensive roofing services ensures that your perimeter drainage, flashing details, and eave protection are fully optimized to handle the winter thaw without causing interior water damage.
Repair Damaged Components and Address Structural Vulnerabilities
Once you have identified problem areas and cleared your drainage systems, you must address physical repairs. Cold weather alters the physical properties of building materials; asphalt shingles become brittle and prone to cracking under low temperatures, while adhesives and caulks lose their ability to form a strong bond. Performing repairs in late summer or early autumn ensures that sealing compounds cure properly in the warm sun before they face moisture and sub-zero conditions.
Minor issues can often be remedied with targeted DIY maintenance or straightforward material replacements. If you discover individual broken or damaged shingles, replace them promptly to restore the overlapping pattern that sheds water. Pipe boots—the rubber collars that seal around plumbing vents—frequently deteriorate from UV exposure long before the surrounding shingles wear out. A cracked rubber boot allows water to run directly down the plumbing pipe into your ceiling cavity; replacing these collars is a quick fix that prevents substantial damage to interior drywall. Additionally, check all exposed nail heads on flashing or ridgelines and dab them with cold-weather exterior sealant to prevent rust and slow leaks.
When dealing with an aging roof that shows widespread surface wear, blistering, or micro-cracks across large sections, simple spot repairs may not be sufficient to survive a severe winter. As materials age, they lose their elasticity and water-shedding capabilities. In these cases, homeowners must decide between localized restoration work or a complete system replacement before heavy winter weather sets in.
Your highest repair priorities should always focus on replacing cracked pipe boots and vent seals, securing loose or lifting shingles with cold-weather roof cement, sealing exposed fasteners and flashing seams, and applying protective membrane coatings to weathered or porous surfaces.
If your shelter has reached the end of its useful lifespan and is experiencing systemic failure, attempting to patch individual spots can be a waste of resources; opting for reroofing before the winter season provides guaranteed protection and long-term peace of mind. Alternatively, if the underlying deck and structure remain in good condition, applying a professional roof restoration service can seal tiny surface cracks, restore UV protection, and add a durable layer of moisture protection that helps an older system withstand heavy winter precipitation.
Optimize Specialty Roofing and Integrated Roof Systems

Properties featuring specialty construction materials or integrated rooftop technology require targeted maintenance protocols before winter arrives. Premium roofing materials perform exceptionally well against severe weather, but their unique physical properties require specialized attention to avoid seasonal hazards. Similarly, secondary equipment mounted on your roof deck can alter how snow and ice accumulate and drain.
Metal roofs are renowned for their exceptional durability, longevity, and ability to shed heavy snow loads efficiently. However, this swift shedding capability creates its own hazards. When large sheets of accumulated snow and ice slide off a smooth metal surface all at once, the sheer weight can destroy ground-level gutters, crush landscaping in the foundation, damage parked vehicles, or injure passersby. Installing snow guards along the lower eaves breaks up large ice sheets and allows snow to melt or fall off in smaller, safer quantities. Additionally, because metal expands and contracts significantly with temperature fluctuations, inspect all exposed fasteners, rubber washers, and standing seams to ensure everything remains watertight.
For integrated specialty systems, your maintenance checklist should include inspecting snow retention systems and snow guards, checking metal panel fasteners for proper tension and seals, clearing accumulated leaves and organic debris from beneath solar arrays, and confirming that all solar mounting brackets and flashings remain completely watertight.
Integrated energy systems, such as solar panel arrays, also require dedicated winter preparation. Solar panels are built to withstand heavy weather, but the space between the panels and the underlying shingles can trap falling leaves, twigs, and pine needles during the autumn. If left unattended, this trapped organic matter retains moisture, creates ideal conditions for rot, and forms a foundation for ice dams directly beneath your power system. Inspect the mounting hardware, ensure all wiring harnesses are elevated above the roof deck to prevent them from sitting in freezing meltwater, and trim any overhead tree branches that might drop snow or heavy limbs onto the glass panels.
Proper planning and precise metal roofing installation ensure that smooth, hard-surface systems shed winter precipitation safely without endangering your gutter system or ground-level structures. At the same time, coordinating seasonal solar services allows homeowners to safely clean beneath panel mounts, protect electrical connections from freezing moisture, and maintain maximum energy production during winter’s shorter daylight hours.
Establish an Emergency Response Strategy With Vetted Professionals
Even the most meticulous autumn preparations cannot eliminate the risk of extreme winter weather events. Unprecedented ice storms, intense wind events, or record-breaking snowfalls can cause sudden structural damage, knock heavy tree limbs onto your house, or create emergency leaks in the middle of a freeze. Attempting to fix a damaged roof during a winter storm is extremely dangerous due to ice, slick surfaces, and freezing temperatures. Having a clear emergency plan in place ensures you can act swiftly and safely if disaster strikes.
Start by creating a comprehensive home documentation file. Gather all existing roof installation records, material warranties, recent maintenance invoices, and your current home insurance policy documents. Store these records digitally and keep a hard copy in an easily accessible location. Take clear, high-resolution photographs of your roof, gutters, attic, and ceilings from multiple angles during dry autumn weather. These baseline photos serve as crucial evidence if you ever need to file an insurance claim for sudden storm damage later in the season.
A comprehensive winter emergency preparedness kit should contain digital and physical copies of all roof warranties and insurance policies, pre-storm baseline photographs of the roof and interior ceilings, contact details for emergency repair teams saved in your phone, and a long-handled roof rake designed for safe snow removal from ground level.
Equip yourself with the proper tools for safe, non-damaging snow management. Purchase a telescoping roof rake with built-in rollers or bumpers designed to clear fresh snow off your eaves from the safety of the ground. Never use sharp metal shovels, axes, or harsh chemical ice melts directly on shingles, as these tools tear asphalt coatings and chemical compounds accelerate fastener corrosion. Most importantly, identify reliable emergency repair specialists in your area long before the temperature drops. When a major winter storm hits a region, service demand surges immediately; homeowners who already have established relationships with professional providers get priority assistance when emergency tarping or snow removal is required.
Reaching out to qualified roofing contractors well ahead of the winter season allows you to review emergency protocols and verify licensing before high-demand periods begin. Partnering with established roofing companies ensures that if an unexpected structural leak occurs during a winter storm, you have immediate access to certified technicians who can safely mitigate damage and protect your home from further interior loss.
Conclusion
The money and time spent on seasonal maintenance represent a tiny fraction of the cost associated with emergency leak repairs, interior drywall restoration, and premature roof replacement. Protecting your home from the top down ensures your interior stays warm, dry, and energy-efficient, no matter how severe the weather outside becomes. Take advantage of clear fall weather today to inspect your property, complete essential maintenance, and enter the winter season with complete confidence.